Free Trial

An Extraordinary Website Utility

Markup Factory provides a full suite of integrated web based components allowing you to quickly develop a powerful and effective website.

From the Factory Floor

Feature Update: Wildcard URLs

April 7, 2009 - 3:34 PM

What We've Been Up to Lately

Introducing Wildcard URLs

We've recently completed an update that we're pretty excited about: Wildcard URLs. This feature gives you the ability to create a Markup Factory page, blog post, event or other object that respondes to a range of URLs using the wildcard asterisk (*) character.  For example, you could create a page with the url /about/*.  This page would then be loaded anytime someone went to:

  • http://yoursite.com/about/staff
  • http://yoursite.com/about/location
  • or any other url beginning with http://yoursite.com/about/

Some new Runtime Variables

In addition to the wildcard urls update, we've added some new runtime variables that you can use in your templates, pages, and snippets.  These new variables give you the ability to read information about the URL of the page you are on.  Before I describe the variables, iet's talk about the structure of the Markup Factory URLs.  URLs in Markup Factory are divided into different segments, for example /path/path2/path3 etc. The new runtime variables then allow you to read an individual segment of the URL. You can reference these segments in MFScript by using the following runtime variables:

  • @path1 - contains the first segment of the url
  • @path2 - contains the second segment of the url
  • @path3 - contains the third segment of the url
  • ...
  • @pathN - contains the Nth segment of the url

For more info on using runtime variables, take a look at the MFScript documentation.

Using Markup Factory Wildcard URLs

You may be thinking, this is cool, but when would I ever use this? Wildcard URLs are exciting on their own, but you can really start to see the possibilities available when you use wildcard URLs with dynamic snippets, datasets and the @path runtime variables. Coupled with the dataset and dynamic snippet features, you can use wildcard urls to create a simple page that displays a specific record from a dataset based upon one or more of the @path variables. We'll save any more discussion on this for a later tutorial, but feel free to try out these new features in your site, and let us know if you have any questions!  You can also review the folllowing tutorial for more information on pulling content from your datasets based on the URL - "Tutorial: Adding URL-Specific Content to your Template using Datasets and Dynamic Snippets".

Church Websites

March 2, 2009 - 3:14 PM

The Purpose Driven Website

This weekend, I made the trip down to Ministry 2.0 in Austin, TX. In addition to spending some great time with some smart and passionate people down there, I enjoyed the sessions by Nathan Smith, Stephen Anderson, and Jason Reynolds. One of the main themes I saw woven throughout the conference was related to building your church website based on a strong sense of purpose.

With so many exciting and quickly changing technologies happening on the web right now, it can be tempting to just pick out the things that appeal to you and make them part of your website. A beautiful photo slide show for the home page... a little online video... a blog for the pastor to write on... a facebook group for everyone to join... a twitter account to post updates to... and you've got yourself a modern and relevant website - or so it might seem.

The important thing to remember is that many of these great example uses of web media you are seeing out there have a whole story behind them that goes well beyond just the technology itself. The medium itself is not what makes a website great, it is the implementation and use of the medium to accomplish a defined goal that makes a church website extraordinary.

In my experience building church websites over the years, I have normally started out every church web project by asking the client to define a few things:

  • "Who is your audience?"
  • "What is the purpose of the website?"
  • "What action do we hope visitors to the website will ultimately be lead to?"

Answering these questions usually takes us most of the way towards determining the information architecture of the site (or what will be on the site and how will it be organized). Usually, we're just trying to answer these questions off the top of our heads. Stephen Anderson shared one concept in his sessions that I think can help us better answer these questions and gets more the heart of the matter and it is simply:

"What needs do you have in your church?"

Note that this question is not, "What needs do you have in your church that your website can help you meet?". The question focuses the discussion just on the needs of the church and not yet on how those needs will be met. We really get to the core of what the church is about and this will later lead into making the website into a vehicle to help accomplish the purposes of the church. Every feature, function, and organizational element of the website needs to flow out of the purpose of meeting the needs that are identified here.

One example we discussed in my group was someone's stated need of helping the elderly members of the church to speak more wisdom into the lives of the younger members. I remembered a story a while back when YouTube was just starting to become very popular. An elderly british man (I wish I could remember his name) started sharing his life stories on YouTube and his popularity amoung younger viewers exploded. I think this was because of his authentic content and the fact that his stories came from another time in our history that is so foreign to the younger generation. There was wisdom in his videos and because it was through a medium that was relevant to the younger generation, a need was met for many who participated.

In light of this example, one way you could meet this need on a church website would be to use video to allow elderly members to share testimonies or other wisdom in a medium that is welcomed and acceptible by people who might not otherwise be exposed to this wealth of life insight. There would be benefit to both sides and people who may not otherwise interact could do so using web technologies.

There are numerous other ways you can apply this thinking and I think we need to go through this excercise extensively when planning and building our church websites.

Find Your Next Home With Markup Factory

February 27, 2009 - 12:00 PM

Everyone knows the real estate market is going through tough times now, but that doesn't mean there aren't deals to be found. If you're in the market for a home, some of our clients have recently launched sites that can help you find the perfect fit for your family or business. If you're a Realtor, we can help you create an experience to get potential buyers in the right place. If you're a web designer with clients that are Realtors, we can provide the ideal platform to integrate with the real estate services they already use.

Venture Homes The Generations Group RE/MAX Real Estate Centre

Venture Homes, The Generations Group Realtors, and RE/MAX Real Estate Centre are three companies located in Iowa that have recently launched Markup Factory sites that directly integrate with their MLS (Multiple Listing Service) systems to let potential buyers search, learn, and communicate about the properties they have for sale.

Markup Factory has the capability to integrate with different MLS systems. This not a feature available with any of the standard packages, but (very reasonable) pricing can be discussed by contacting us.

There are a few companies out there that act as real estate website factories, churning out hundreds of sites with sub-standard design and usability. Most of their clients go on blissfully unaware that what they bought is probably not search engine friendly and certainly does not meet the expectations of today's web-savvy audience. We take a different approach: Build a great, easy to manage website, and integrate the real estate features into that framework. The sites mentioned above were designed by our in-house design team, but if you're a designer or a Realtor with your own designer, it's easy to make something just as good or better. In the end you'll end up spending less money for more quality. In this market, you can't afford to leave your customers with a bad taste in their mouth.

These sites (we're launching more soon) download the listing data daily and automatically update the site content. You don't need to do anything once it's set up (unless you want to, of course.) We currently have sites set up in the central Iowa and eastern Iowa areas, but we can work with your broker and MLS provider to set up a site anywhere in the US. We've been building sites for Realtors for over 10 years here, too, so we speak RETS, IDX, FTP, GLA and all of the alphabet soup that goes along with the business.

If you've visited the above sites and have any comments, we would love to hear them. If you're in the market for a website, with or without real estate features, sign up or drop us a note. We can't wait to work with you to bring your customers a top-of-the-line web experience.

A Script For Breadcrumb Navigation

January 28, 2009 - 11:00 AM

Most web users are familiar with breadcrumb navigation. It can be useful when a site is organized in a hierarchical fashion. Yahoo! has detailed the typical problem and solution in their Design Pattern Library.

This short tutorial will provide a JavaScript that you can include in Markup Factory or any other web site. The script will be detailed here. It's pretty advanced, but if you follow the requirements set out here, you can just download it and put it on your site.

In order for this to be as simple as possible, there are some things that must be done in order for this to work. Fortunately, Markup Factory makes this easy. Here are the requirements:

  • The Prototype JavaScript Framework. We're fans of Prototype.js here at Markup Factory, and this script uses some of Prototype's features, which will be explained here.
  • The URLs of your pages must be hierarchical and each level must be a valid link. That means if you have a page located at /about/products/widgets/foo/, then /about, /about/products, and /about/products/widgets must also be real pages. This is easy in Markup Factory, as you can give a page any address you like.
  • When the script runs, it replaces underscores (_) and dashes (-) in the URLs to make the breadcrumb navigation. Using other characters and file extensions may result in the results not being as pretty as possible.
  • The end user must have JavaScript enabled. If they don't, no problem, they just won't see the breadcrumbs.

How it Works

The script does the following when the page loads:

  • Take the URL path and split its parts into an array, excluding empty parts.
  • If there are more than 0 parts, add a “Home” link to the root of the site.
  • Go through each part of the path and create a URL and a link.
  • Take the part and replace _ and - with spaces, then capitalize each word and make that the link.
  • Once that's complete, find a DIV on the page with an ID of “breadcrumbs” and replace its contents with the link you've created.

So, if your URL is http://gottung.net/my/page/for-the/bread_crumbs/test/, you'll get something like this:


Home > My > Page > For The > Bread Crumbs > Test


The code is in two functions. The first part extends the native JavaScript String to have a capitalize_each_word function:

String.prototype.capitalize_each_word = function () {
    var words = this.split(" ");
    var str = "";
    words.each(function (word, index) {
        str += word.capitalize()
        if (index !== (str.length - 1)) { str += " "; }
    });
    return str;
}

This demonstrates a powerful but controversial feature of the JavaScript language, often called Monkey patching. You can add methods to any object, even native ones. This should be done with extreme caution as it could create conflicts with other peoples' code and wreak havoc. This case seems pretty harmless, so let's go with it.

The next part is the actual function, which is placed inside a document.observe callback which fires when the DOM is ready. This means that when the page is downloaded and ready to go, then this script will start. Prototype.js uses this pattern to make starting your scripts a little easier.

The rest of the code isn't pretty, but it does exactly what was described earlier. The Prototype.js-specific functions used are: document.observe(), Array.without(), $, Array.each(), String.gsub(), and Element.update(). You'll also see our capitalize_each_word() function in action:

document.observe('dom:loaded', function () { 
    var output = "";
    var url = "";
    var path = location.pathname.split("/").without("");
    var div = $("breadcrumbs");

    if (path.length >= 1) {
        output += "Home > ";
        path.each(function (i, index) {
            url += "/" + i;
            i = i.gsub("[-|_]"," ").capitalize_each_word();
            if (index !== (path.length - 1)) {
                output += "" + i + " > ";
            } else { output += i; }
        });
    }
    if (div) { div.update(output); }
});

Including in Your Markup Factory Site

You can download this script below and add to a Template or Snippet. Somewhere in the page body, usually before the main content of the page, you'll need to put a DIV where the breadcrumbs will be inserted:


You'll usually leave this empty, but you can put whatever you want within the DIV tag. It will be replaced when the script runs.

Then, somewhere before the closing of the BODY tag, include Prototype.js (served from the Google AJAX Libraries API) and the script:


Upload breadcrumbs.js to your Files and you're ready to go.

Download the Script

breadcrumbs.js

Related Resources on the Web

Conclusion

We hope you were informed and enlightened by this example. Any comments would be appreciated, and help is always available at support@markupfactory.com. If you haven't yet experienced how Markup Factory can help you make a great web experience, try the demo. We hope you like what you see. If you do, sign up.

Multiple Account Support

January 16, 2009 - 11:55 AM

If you design or manage multiple websites, you may find our "Linked Accounts" feature useful. This feature allows you to quickly jump back and forth between the administrative interfaces for all of the websites that you manage.

Change Account

If you join our Design Partner program, we automatically link all of your accounts together, which makes supporting your clients that much easier.

Tutorial: Adding URL-Specific Content to your Template using Datasets and Dynamic Snippets

November 7, 2008 - 10:06 AM

This tutorial will walk you through the steps to display content in your templates based upon the requested URL.

Step 1: Building a Custom Dataset for your Content

First, we are going to build a custom dataset to hold the content for our template.

To create your dataset, open your Markup Factory Admin Dashboard, and click on the Database Module. Once in the Database module, click "Add Dataset" to create your custom dataset.

We'll need to give our dataset a descriptive name, so name it something like "Dynamic Template Content", and click "Create Dataset."

Now our dataset is created!

Our dataset has been created!

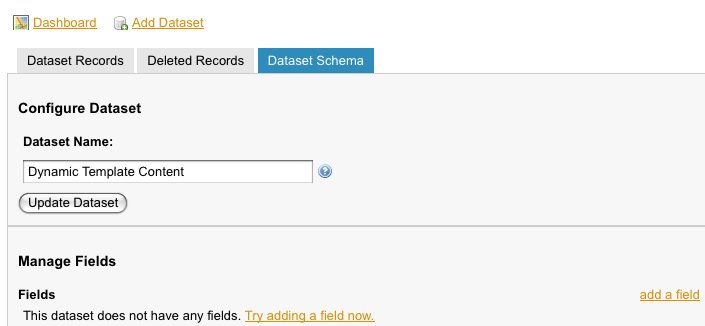
As you can see, it doesn't have any fields yet.  Our next step is to add some fields to our dataset.  We want the content in our template to change based upon what the current URL is, so our dataset will have the two following fields:

  • Content (Text):  This will contain the content to display for each URL.
  • URL (Text): This is the URL that is associated with the content to display.

To begin adding fields, click the "add a field" link.  We'll go ahead and add the "URL" field first.  For the field name, enter "URL".  We will want this field to be a text field, so for the field type, choose text.  There are several other field types available, but for this tutorial, we will only be using the text field type.  The Include in List View option allows us to choose whether to display this field when view the records in the dataset list view.  For the "URL" field, we will want to enable this option.  Finally, we can choose an input type for this our field.  There are two options for the "Text" field type: Text Box, and Text Area.  Let's choose "Text Box" for this field.

Adding the URL field

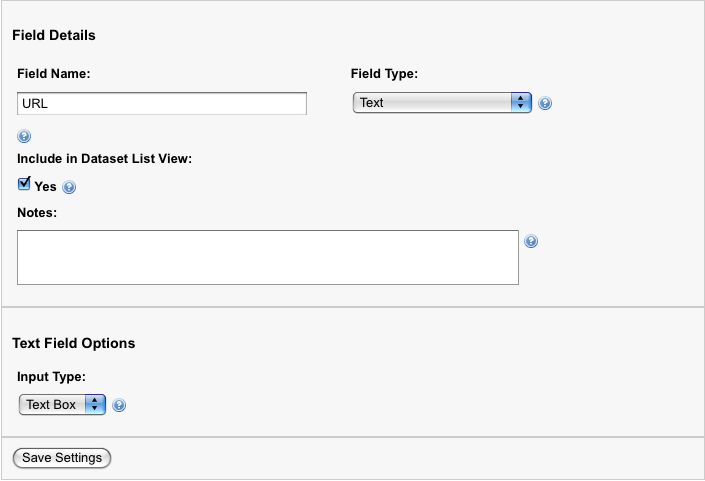
Click "Save Settings" to add the "URL" field. 

There, our "URL" field has been added.  We still need to add our "Content" field though.  Go ahead and add the "Content" field, naming it "Content."  Select "Text" as the field type.  We don't want the content field to appear in the list view, so leave the list view box unchecked.  Finally, instead of a text box, choose "Text Area" as the input type, and save the field.

The dataset has now been built!  For now, we just have an empty dataset.  Eventually, we will add a record for each URL that we want to display custom content on.  For now, however, we'll only add one record to test our example.

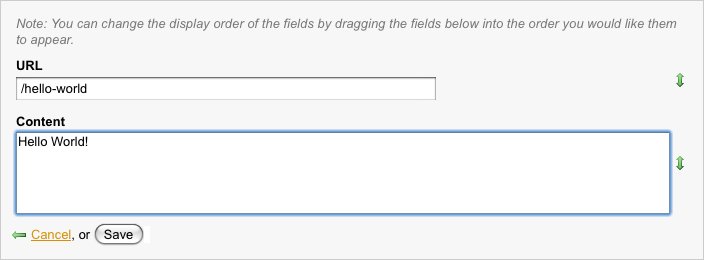
To add a record to the dataset, click the "Dataset Records" tab.  You should see that there aren't any records currently in the dataset.  Click "Add a record" to get started.  For this example, lets add a record for a page with the url "/hello-world".   Enter /hello-world in the URL field, and in the content field, enter the text Hello World!.  Click "Save" to add the record.

There we go!  We've created a custom dataset, and have a record in it.  You can add some more records if you like.  Let's move on to step 2.

Step 2: Creating a Dynamic Snippet to Display Data from our Dataset

In this step, we'll create a dynamic snippet to display the data we just entered in our custom dataset.  Dynamic snippets allow you to link a snippet to a dataset, and wrap the data in the dataset with whatever HTML your would like.

Let's get started creating a new dynamic snippet.  Go back to your Markup Factory dashboard, and click on the "Templates" module.   To add a new snippet, click "Snippets", and then click "Create Snippets" near the bottom of the page.

Now, we'll setup our dynamic snippet. First we'll need to choose a name.  Let's name this snippet dynamic-content.  Next, we can choose a "Linked Dataset" for our snippet.  Linked datasets are a handy  tool to display dynamic data in our snippets.  We want to link to the dataset we created in step 1, so choose Custom: Dynamic Template Content from the drop down.

Next, we need to setup what data to display from our dataset.  There are several options available.  For this example, we only want to display the record for the URL of the current page.   To do so, we will add a filter based on the runtime variable, @url.  Under "Filters", click "Add Filter" to setup the filter.   We need to only display records where the URL field matches the @url runtime variable.  Select URL from the first drop down. The second drop down should be set to equals.  Finally, enter @url in the text box, and click Add Filter.

Note: The @url field does not contain trailing forward slashes.  For example, /hello-world/ is treated as /hello-world by the @url runtime variable. 

Add a filter

This filter will now only display records in the snippet when the current URL matches the URL field in our custom dataset.

Now, we just need to tell our snippet how to display the dynamic data from our dataset.  On dynamic snippets, you will see four different fields that will help you display the data:

  • Snippet Contents: This is the contents of the snippet.  On dynamic snippets, the Snippet Contents are "wrapped" around each record in the linked dataset.  For each record in your dataset, the snippet contents is applied to the record, and then appended to the snippet contents for each previous record. 
  • Snippet Header HTML: This field allows you to enter HTML that will appear before the snippet contents, and is not applied to each dataset record.
  • Snippet Footer HTML:  Similar to Snippet Header HTML, but this fields contents will appear after the snippet contents have been applied to the dataset.
  • Empty Dataset Text: This field gives you the ability to enter text or HTML to display if your dynamic snippet cannot find any matching records in the dataset.  This is helpful to dsiplay text such as "No records could be found", etc.

In this example, we will enter the following code in the "Snippet Contents" field:

<div></div>


The is the syntax used to reference the fields of the linked dataset.  will display the text in the contents field.  For a list of the snippet syntax for the fields on your linked dataset, click the "Show Dataset Field Syntax" link.

Enter the snippet contents

For this example, we don't need to enter anything in the Snippet Header HTML or Snippet Footer HTML fields, so we'll skip those. However, we will want a message to display if a record doesn't not exist in the dataset for the current URL.  We'll use the Empty Dataset Text Field.

In the Empty Dataset Text field, enter:

<div><p></p></div>


We've entered all the data we need for our example.  Now we'll save our snippet.  Click Ok to save the snippet.

Congratulations!  We've created a dataset and linked it to a dynamic snippet!  The last step is to display the contents in a template.

Step 3: Testing the Dynamic Snippet

Alright, we've finished the complicated part of the tutorial.  We just need to add our snippet to a template, and test it out by creating a page.

Let's create a new template by going to the Markup Factory dashboard, clicking on the Templates module, and selecting "Add Template."

Name the template "Dynamic Data", and for the template contents, enter the following:

<!DOCTYPE html PUBLIC "-//W3C//DTD XHTML 1.0 Strict//EN"
"http://www.w3.org/TR/xhtml1/DTD/xhtml1-strict.dtd"> <html xmlns="http://www.w3.org/1999/xhtml"> <head> <meta http-equiv="Content-Type" content="text/html; charset=iso-8859-1" /> <title>Untitled Document</title> </head> <body> <div style="width: 400px"> <div style="float: right; border: 1px solid #000000; margin: 10px; padding: 2px;"> {{include name="dynamic-content"}} </div> {{maincontent}} </div> </body> </html>


Click Ok to save the template.

Next, we need to create a page to test our example.   Go to the markup factory dashboard, click on the Pages module, and select "Add Page." 

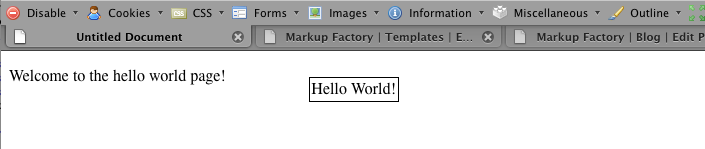
For the page title, enter Hello World!.  In the url field, we'll enter the URL in our custom dataset record, /hello-world.  Choose the template we just created, "Dynamic Data", as the page template.  For the page contents, enter:

Welcome to the hello world page!

Click save to save the page.

Ok, lets give this a try!  To test out our dynamic snippet, open your web browser, and navigate to: http://[your-site-url]/hello-world

You should see your dynamic snippet outputting the data from the custom dataset we created!

Hello World!


Copyright © 2024 Cramer Development also offering Web Design in Iowa City. All rights reserved.Terms of ServicePrivacy PolicyFAQContact Us